Sunday, December 4, 2016

Coding Project 3 - STEM - Lou Person

STEM Lab by Lou Person: Draw a Box.

In this lab, you will use the Quite BASIC coding emulator to draw four lines next to each other and then modify the code to draw a box.  You will use a FOR statement to loop through code.  You will also work with the PLOT command, which has the following syntax: PLOT X, Y, C  where X is the X axis, Y is the Y axis and C is a color.  Also, you will use subroutines to plot the four lines.

First, enter this code into the Quite BASIC emulator to draw a line 10 blocks high:
2000 CLS
2110 LET X = 0
2115 LET L=10
2140 LET C = "green"
5000 REM Subroutine -- draw a line
5010 FOR Y = 0 TO L
5020 PLOT X,Y, C
5030 NEXT Y

Second, you will use a subroutine to call the common code which will draw a second line. 
5000 is the subroutine.  Add a line 2150 to call it the first time:
2150 GOSUB 5000
You will then need to add a RETURN at the end of the subroutine so it can return to the next line after 2150 once it completes:
5500 RETURN

You need to offset the second line to the right, so you will need to increase X by L (L is the length of each side of the square).  You will see it in this code:
2160 LET X=X+L
Then call the subroutine again after increasing X by L.
2170 GOSUB 5000
Also, add a program end after 2170 so the program stops after the last time the subroutine is called:
4000 END

Your code should now look like this:
2000 CLS
2110 LET X = 0
2115 LET L=10
2140 LET C = "green"
2150 GOSUB 5000
2160 LET X=X+L
2170 GOSUB 5000
4000 END
5000 REM Subroutine -- draw a line
5010 FOR Y = 0 TO L
5020 PLOT X,Y, C
5030 NEXT Y
5500 RETURN

Third, now you need to draw your horizontal lines.  Here we will draw the top.  Since the FOR loop with the PLOT command adds the blocks up and down (it changes Y, which is the vertical axis), you need a different FOR loop which adds blocks side to side (so it changes X).  This means, you will need to add a second subroutine and call it for the 2 horizontal lines.

Start the subroutine on line 6000.  You will create a FOR loop which changes the X access so your blocks go side to side within the PLOT statement:
6000 FOR X=0 TO L (since it is a square, L will be 10 because all sides are the same size).
Now put the same plot statement
6010 PLOT X,Y,C
6020 NEXT X (This increases the X access by 1 so blocks go side to side)
6030 RETURN (This returns to the point in the code where it was called).

Since you already called the subroutine twice to print the sides of the square, you now need to call it to print the top and bottom.  Add 2190 to call the new subroutine by changing 5000 to 6000
2190 GOSUB 6000
You also need to move the line up 10 spaces (offset the Y access by 10 so it starts at the top of the square).
2180 LET Y=10

Fourth, you will draw the bottom line.  Since we are at the bottom, the offset is 0 because it is the bottom.  In this case, the Y offset is 0. 
3000 LET Y=10
3010 GOSUB 6000

And your program will stop on line 4000 with the END

Your code should now look like this:
2000 CLS
2110 LET X = 0
2115 LET L=10
2140 LET C = "green"
2150 GOSUB 5000
2160 LET X=X+L
2170 GOSUB 5000
2180 LET Y=10
2190 GOSUB 6000
3000 LET Y=0
3010 GOSUB 6000
4000 END
5000 REM Subroutine -- draw a line
5010 FOR Y = 0 TO L
5020 PLOT X,Y, C
5030 NEXT Y
5500 RETURN
6000 FOR X=0 TO L
6010 PLOT X,Y,C
6020 NEXT X
6030 RETURN

Fifth, now that you are done, test what you have learned by making each line in the square a different color.  You will do this by setting C to blue, red or white before you call each subroutine by adding another line.  If you have trouble comment on this post.

Lab by Lou Person


Sunday, November 27, 2016

Coding Project 2 - STEM - Lou Person

STEM Lab by Lou Person: Draw four boxes.

In this lab, you will use the Quite BASIC coding emulator to draw four boxes in a row.  You will use a FOR statement to loop through code.  You will also work with the PLOT command, which has the following syntax: PLOT X, Y, C  where X is the X axis, Y is the Y axis and C is a color.

First, enter this code into the Quite BASIC emulator:
2000 CLS
2110 LET X = 4
2140 LET C = "green"
5000 REM Subroutine -- draw a circle
5010 FOR Y = 0 TO 4
5020 PLOT X,Y, C
5030 NEXT Y

Second, run the code.  You'll see the 4 boxes appear.

Third, change the value in the FOR statement from 4 to 10.  What happens?

Fourth, change the word "green" to "red".  What happens when you run the code?

Fifth, change the PLOT statement to say PLOT X+5,Y,C and run the code.  What happens?

Sixth, change the PLOT statement to say PLOT X+Y,Y,C and run the code.  What happens?

The FOR statement gets executed starting at 0 up TO the number of times you enter.  So, when you change it to 10, you should notice that 10 boxes appeared instead of 4.

The statement LET defines a variable.  In line 2140, you defined a string variable which is why the word is in between double quotes.  If you change the color to another color, such as red, the boxes are drawn in red.  In line 5020, the PLOT command uses C to determine what color it should draw the boxes in.  So when you change C to a different color, the PLOT statement will draw the boxes in that color.

The PLOT statement draws a box, or pixel, based on the X and Y coordinates provided.  This is similar to a chart with an X and Y axis.  By adding 5 (X+5) to the X access, the line of boxes starts 5 boxes to the right.  This is also known as offsetting by 5 pixels. 

Each time the FOR loop is executed, the values will be:
X     Y
4      0
4      1
4      2
4      3
4      4

To make the line horizontal, each box will need to move up 1 pixel and right 1 pixel.  The Y access increases 1 each time.  In order to move 1 to the right each time, add Y to X.  The coordinates will look like this:
X     Y
4      0
5      1
6      2
7      3
8      4

These are the coordinates that represent a horizontal line.

Coding Project 1 - STEM - Lou Person

STEM Lab by Lou Person: Introduction to Quite BASIC.


This lab is geared for students ages 10-12.  It should take 15 minutes to complete.  The goal of this lab is to get used to work with the Quite BASIC coding emulator.  During the lab, you will edit the code and then run the code.  You will also test and fix a bug in the code.


Second, change the code to this (you can select the old code, delete it and copy and past this code in:


1200 CLS
2010 REM
2020 PRINT
2300 REM User input
2320 PRINT "Press 1, 2, 3, 4, or 5!"
2330 LET A = GETCHAR()
2340 IF A = "1" OR A = "2" OR A = "3" OR A = "4" OR A = "5" THEN GOTO 2370
2350 PAUSE 100
2560 GOTO 2330
2370 PRINT
2380 IF A = "1" THEN PRINT "1 ----------"
2390 IF A = "2" THEN PRINT "2 ----------"
2400 IF A = "3" THEN PRINT "3 ----------"
2410 IF A = "3" THEN PRINT "4 ----------"
2420 IF A = "5" THEN PRINT "5 ----------"
2430 END
5040 RETURN

Third, fix the bug where A is not being checked for 4.

Fourth, change the print statement to replace the ------------ with meangingful messages of whatever you want.


Sunday, September 4, 2016

Internet of Things - First Project - AWS - Lou Person

Internet of Things - First Project - AWS - Lou Person


The goal of this post is to summarize how I built my first IoT project.  Earlier posts showed "Hello World" applications.  Well, this project is a Hello World for IoT.  If you are a Maker, Student, Teacher, Entrepreneur, Hobbyist, etc. and are interested in building this on your own, feel free to contact me. 

By way of background, this whitepaper is helpful in describing AWS IoT (I work for AWS): http://d0.awsstatic.com/whitepapers/core-tenets-of-iot1.pdf

My Project demonstrates how a device can read temperature data from a sensor, send it back to AWS IoT and have actions taken upon the data (rules).  In the case of this post, the IoT rule will text my phone with the temperature from one of the sensors.

First, I built the device with the sensors.  The Grove Indoor Environment Kit for Intel Edison by Seeed Studios was used.  You can buy one here.  The kit contains 11 sensors, an Intel Edison Processor and a base shield where all the sensors connect.

This post is a prototype solution allowing the maker or student to get started with prototyping of their device. 

The kit runs an Intel Edison processor with Linux embedded into it.  The kit is attached to a PC or Mac using 2 USB cables.  The Linux operating system is then logged into via COM ports or SSH over WiFi once the unit is configured.  At first login, the root password is set and the device is configured (given a name and connected to WiFi).  A number of libraries are installed that are prerequisites for the software which is installed on the unit.  On Github in one of the AWS repositories a python script exists.  This script reads the sensors on the board and makes calls to AWS IoT to send the sensor data back. 

An AWS Console login is required.  
Once you login, go to AWS IoT and create a thing type.   Then, create a Device in the thing registry: http://docs.aws.amazon.com/iot/latest/developerguide/create-device.html

Choose the thing type created above.  Hit Create.


Create and activate a device certificate: http://docs.aws.amazon.com/iot/latest/developerguide/create-device-certificate.html

Download the keys.  They will be entered into the device in later steps.

Attach a thing to a certificate: http://docs.aws.amazon.com/iot/latest/developerguide/attach-cert-thing.html

Select the certificate.  Select Actions.  Select Attach a thing.  On Confirm, enter the thing name and hit attach.

Create an AWS IoT Policy: http://docs.aws.amazon.com/iot/latest/developerguide/create-iot-policy.html
Press Add 

Attach an AWS IoT Policy to a Device Certificate: http://docs.aws.amazon.com/iot/latest/developerguide/attach-policy-to-certificate.html
Select the certificate.  Select actions.  Select Attach a policy.

On confirm, enter the thing name and hit attach.
Click on the thing you created and view the detail.  In the detail, look at the REST API endpoint.  You will need the information between the https:// and /things.  For example: xxxxxxxx.iot.xx-xxxx-1.amazonaws.com You will need this in steps below.

Physically connect the boards
Connect the board to the PC
Install the Intel Windows standalone driver from here: https://software.intel.com/en-us/iot/hardware/edison/downloads
Install the FTDI drivers from here: http://www.ftdichip.com/Drivers/D2XX.htm
MacOS 10, no drivers needed
Determine the Serial Port you’ll need to communicate with the Edison in the Device Manager (MacOS, don’t worry.

Connect via Windows
a.       Use PuTTY to connect:
b.      Change the Connection type to “Serial”
c.       Enter the COM port in the “Serial line”
d.      Change the Speed to 115200
Connect via MacOS 10
a.       Open a terminal window
b.      Run ‘ls –l /dev/cu.usbserial*
c.       Using the device found in the command above, launch: ‘screen /dev/cu.usbserial-… 115200

Configure Edison
Open a terminal window
Run ‘ls –l /dev/cu.usbserial*
Using the device found in the command above, launch: ‘screen /dev/cu.usbserial-… 115200
Login as root with no password.  Then run configure_edison --setup
Assign a password
Attach to a WiFi Network
Name your unit

Install the certificates created in IoT Console
Make sure you are in the home directory cd ~
Make a directory called certs, changed into it
mkdir certs; cd certs
Create 2 files and copy and paste the appropriate contents (from when you created the certificates) into each file
nano certificate.pem.cert
nano private.pem.key
Go to the files that were downloaded before, xxxxx-private.pem.key and xxxxx-public.pem.key.  Open them in Wordpad.  Copy the entire file including the -----BEGIN and -----END lines.  Save the text copied from xxxx-private.pem.key into private.pem.key and xxxxx-public.pem.key into certificate.pem.cert
Ctrl-O to WriteOut, then Ctrl-X to exit
Download the latest version of the root certificate
wget https://www.symantec.com/content/en/us/enterprise/verisign/roots/VeriSign-Class%203-Public-Primary-Certification-Authority-G5.pem
Rename this file to CAroot.pem
mv VeriSign-Class\ 3-Public-Primary-Certification-Authority-G5.pem rootCA.pem

Install the required code and libraries     
Make a directory called code. mkdir code
Change into the directory.  cd code  
Use git to download the AWS IoT SDK for Python
git clone https://github.com/aws/aws-iot-device-sdk-python.git   
Change into the newly downloaded directory
cd aws-iot-device-sdk-python
Install the newly created code
python setup.py install
Run package updates on the image from the server, enter these two commands:
a.      Opkg update
b.      Opkg upgrade

Install MRAA and UPM
The MRAA library is used for low-level communications with the input/output hardware on the Intel Edison device
The UPM library is used for higher-level communications (on top of MRAA) with various sensor devices
More information on the libraries is available here:
Make sure you’re back in the code directory
cd ~/code
Download the MRAA library
git clone https://github.com/intel-iot-devkit/mraa.git
Change into the newly downloaded MRAA directory
cd mraa
Make and install the MRAA libraries
mkdir build && cd build && cmake ..
make && make install
Now Install UPM.  Make sure you’re back in the code directory
cd ~/code
Download the UPM library
git clone https://github.com/intel-iot-devkit/upm.git
Change into the newly downloaded UPM directory
cd upm
Make and install the UPM libraries
mkdir build && cd build && cmake ..
make && make install
Install the application code to read the temperature from the sensor. 
cd ~/code; wget https://s3.amazonaws.com/gasworkshop/sendTempHumid.py
Edit the file sendTempHumid.py and change the name to your thing

Run the script:
python sendTempHumid.py -e xxxxxxxxxxxxx.iot.xx-xxxx-1.amazonaws.com -r ~/certs/rootCA.pem -c ~/certs/certificate.pem.crt -k ~/certs/private.pem.key

Note: the value xxxxxxxxxxxxx.iot.xx-xxxx-1.amazonaws.com came from the REST API Endpoint as described above
Create a rule to send the results to your cell phone
Click on create a resource.  Click Create a rule.
Give it a name and description.
For attributes, for the purpose of the lab, enter * to pick up all attributes.
For the topic filter, enter # to pick up all topics.
Leave the condition blank for the purpose of the lab.
For action, choose Send message as a push notification (SNS) 

If you don’t already have an SNS target:
Click create new resource to go to the SNS Console.
Click Create new topic.
Give the topic a name and description.  Click create topic.
Click the topic and select “Subscribe to topic” from the actions.
Change the protocol to SMS and enter your phone number.
Click create subscription
Hit refresh next to the SNS target.
Select the target you created and want to use.
Click create new role, give it a name, and hit create.
Click add action and then create.
Run the code again and you should get a text message to your phone with the temperature and humidity.

Post by Lou Person, I work at Amazon Web Services.

Saturday, July 9, 2016

AWS Alexa Skill - Lou Person


AWS Alexa Skill - Lou Person

I recently published a post about how Echo, Dot, Tap and Alexa make the world a better place and improve the life of people with disabilities.  You can read it here:  http://blog.louperson.com/2016/07/amazon-echo-and-alexa-make-life-better-lou-person.html

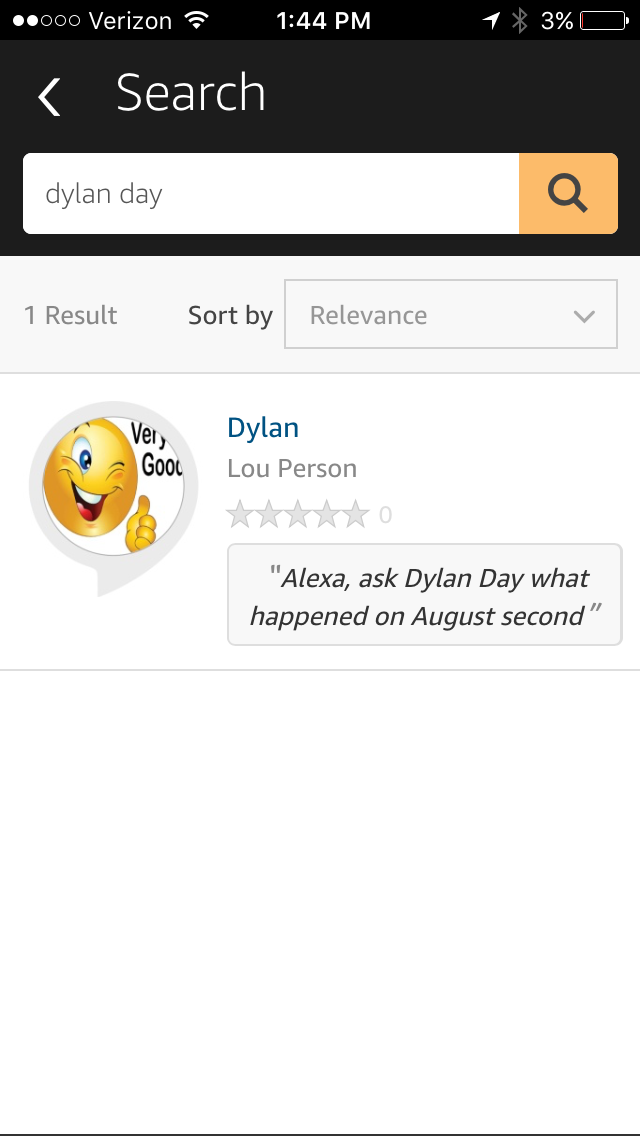
The skill, called Dylan Day, has Alexa lookup events in history that occurred on a given date.  For example: "Alexa, ask Dylan Day what happened on July Fourth" will read out loud events which occurred in history on July Fourth.

The ingredients for the Skill are as follows:
  • An Amazon Web Services Console account.
  • JavaScript JSON for the application itself.
  • The Lambda service inside of AWS.
  • An Amazon Developer account.
To make coding easier (not required) I used the following tool set:
  • Visual Studio with the AWS Explorer installed.
  • Git for moving the code around.
Under a separate post, I describe setting up and securing (through IAM) an AWS console account.  You can read more about it here: http://blog.louperson.com/2016/01/amazon-web-services-over-cup-of-coffee.html

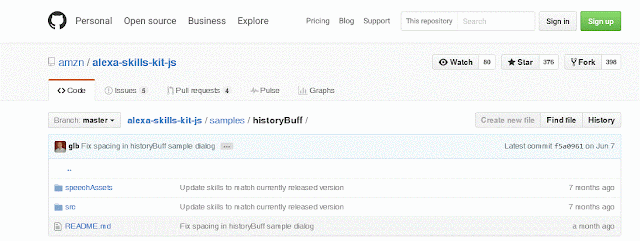
Amazon, for whom I work at Amazon Web Services (AWS), provides a great library of sample skills for developers.  I started with example code found here on GitHub: https://github.com/amzn/alexa-skills-kit-js/tree/master/samples/historyBuff
I cloned the files locally and opened them up in Visual Studio.


The speechAssets directory contains files related to speech utterances and Intent Schema which are entered in the Developer portal. More on this later.  The src directory contains the main application files which are uploaded to Lambda.  There are two files.  AlexaSkill.js and index.js.  AlexaSkill.js communicates with the Alexa service and is called by index.js.  This file pretty much acts as the gateway between the custom skill and the Alexa service.  I thought of it as the railroad tracks.  index.js is the engine which runs on the tracks.  This is where I made the customizations.  It contains the actual code for the skill. 

Most importantly, AlexaSkill.js contains a reference to the appID provided in the developer console.  This value is entered in index.js and passed to AlexaSkill.js This is critical from a security perspective because it will ensure ONLY the intended application can invoke the Lambda function.  In AlexaSkill.js:

function AlexaSkill(appId) {
this._appId = appId;
}

From index.js, I changed this:
var APP_ID = undefined; //replace with 'amzn1.echo-sdk-ams.app.[your-unique-value-here]';
to this (actual code obfuscated):
var APP_ID = 'amzn1.echo-sdk-ams.app.xx9bfexx-1xxf-4287-b0xx-6xx14xxf7cxx';

You can view the original code (I customized for my skill) from the GitHub link above.  I changed the invocation from History Buff to Dylan Day and changed some of the spoken text inside of the code.

I then used Visual Studio to upload the code to my Lambda function as part of AWS. 

Once uploaded, I received an ARN to reference my application in the developer portal.  This is the other side of the security feature above where I entered the appID in the Lambda code, the other side of the control is entering the Lambda ARN in the Developer portal.  Note the arrow in yellow.


Make sure that the Lambda trigger is set to Alexa Skills Kit before proceeding.

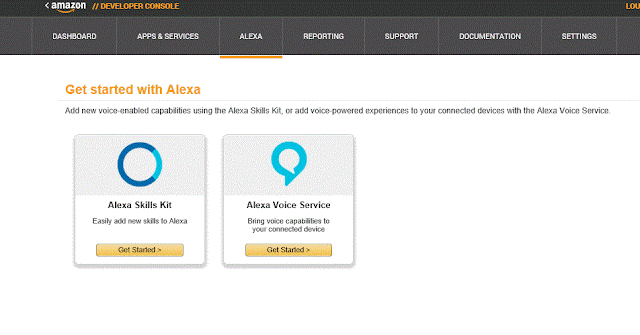
Next it was time to publish the Skill!  I logged into the developer console and selected Alexa Skills Kit. 


I then created a New Alexa Skill.  I chose Custom Interaction Model and will use Smart Home Skill API for another post when I try to integrate my Echo with my home automation system, such as my sprinkler system and HVAC.

Now comes entering the intent schema and sample utterances.  The intent schema and sample utterances are contained in the SpeechAssets folder of the Git repository discussed above. 

Up above, I mentioned that the ARN for the Lambda function in Visual Studio was needed in the developer console.  Make sure you enter the ARN name and not the ARN role. I entered the ARN information in the configuration section.   I did not use Account Linking (I selected no) because I was not linking any end user accounts with the skill.

I was able to test my Skill on my Alexa logged in with my developer account, as well as send test utterances as text through the developer console.  The results of a test are here:

Finally I entered the publishing information for the Alexa installation through the end user Alexa console and privacy information.


I submitted the Skill for certification!  It did take a few rounds back and forth with the certification team, mostly around the Publishing Information page.  Then about 9PM last night, my Skill went live on the Alexa End User console! 


I work at Amazon and the postings on this site are my own and don't necessarily represent Amazon's position. 


Post by Lou Person, I work at Amazon Web Services.


Amazon Echo and Alexa Make Life Better for People with Disabilities - Lou Person


Amazon Echo and Alexa Make Life Better for People with Disabilities - Lou Person


Amazon Echo and Alexa help people with disabilities.  Echo and the voice service which controls it, Alexa, provide the solution.  I want to share a story with you about a terrific young man named Dylan and how he uses Echo.

Our friends Karen and Jeff have a son named Dylan who is blind.  At a barbeque recently, we were talking about all the ways Dylan uses Echo in his life.  As an example, he reads Harry Potter through Echo using Alexa.  He also uses many of the applications and games available through the Amazon Alexa Console. 

Dylan's father, Jeff asked me if I could build a game for Dylan, so I wrote a small Alexa skill for Dylan called "Dylan Day".  Dylan Day will cite historical events which occurred on the day spoken.  It will pull the information from Wikipedia then read it out loud.  "Alexa, Ask Dylan Day what happened today".  "Alexa, Ask Dylan Day what happened on July 4th".  The Echo will read actual events which occurred throughout history on those days.

A skill is an application or game which Alexa runs.  In other words, developers train Alexa with specific skills they write.  In this case, "Dylan Day" will recite all the events which occurred on a certain day in history.  It will query against Wikipedia and read back the events on the date spoken.  Although the skill itself is relatively simply, hopefully Dylan feels like a rock star having his name used as the invocation phrase of a skill running through Alexa that is available to the entire world.

If you have an Echo, Dot or Tap install the skill "Dylan Day".  On your phone login to the Alexa app (on your computer go to: http://alexa.amazon.com).  Click on skills and search for "Dylan Day". 
Here are some of the interactions for the Skill:
"Alexa, Ask Dylan Day"
"Alexa, Ask Dylan Day what happened today"
"Alexa, Ask Dylan Day what happened on July Fourth"
"Alexa, Ask Dylan Day what happened on December 31"

Although the application is very simple, I hope it has a big impact for Dylan and anyone else who uses it. 

I wrote another post that is technical in nature which describes all the components that go into the Dylan application.  This includes the AWS Console, Lambda Service, Amazon Developer Console, Javascript JSON and AWS Explorer in Visual Studio.  You can view the post here:  http://blog.louperson.com/2016/07/AWS-Alexa-Skill-Lou-Person.html

Please reference the source of the initial code (which I modified slightly for Dylan Day).  The skill originated from an example skill publicly available found here: https://developer.amazon.com/public/solutions/alexa/alexa-skills-kit/docs/using-the-alexa-skills-kit-samples

I work at Amazon and the postings on this site are my own and don't necessarily represent Amazon's position.


Post by Lou Person, I work at Amazon Web Services.


Sunday, February 14, 2016

Next Generation of Talent - Lou Person

Next Generation of Talent - Lou Person


I am proud to be an Ambassador for New York City Business Solutions as part of the Next Generation of Talent program.  As an Ambassador, my job is to build awareness for the program and discuss the impact hiring and developing young adults inside my organization helped me achieve great levels of success.


"The Next Gen of Talent Business Ambassadors Program is a partnership between NYC Department of Business Services and New York City businesses committed to hiring young adults (ages 18-26) and encouraging other local businesses to do the same."  You can read more here:  http://www.nexgenoftalent.nyc  and specifically about our company here: http://www.nexgenoftalent.nyc/brightstack.html

Keeping up and being competitive means planning in advance to stay ahead. Especially in the city that never sleeps, businesses are always reinventing and innovating themselves — serving up the newest trends, using the latest technology. My company, brightstack, has already succeeded in gaining an edge by hiring young adults.

There is no way to truly articulate the value of hiring and developing the best talent, but the results are certainly tangible.  I was able to successfully sell my business when valuations in our industry (technology services) were peaking.  The organization who acquired us pointed to two main aspects of the organization as drivers for doing the transaction:  Our platform and our young leaders. 

Young leaders are incredibly valuable because of all the upside they represent.  I made a conscientious decision to invest in young leaders; to hire the best based on attitude, train them on skill and develop them as leaders.  Clearly, this investment has paid dividends as the organization continues to grow and provide outstanding levels of customer service.  It is a gratifying feeling seeing our young leaders grow and step up into larger leadership roles and taking on additional responsibility.  I also take pride that, in the long term, my acquirer will see return on their investment as our young leaders flourish in the organization.

I have always taken a personal interest in the careers of the talented staff with whom I've had the privilege of working.  My approach was never to treat them as "employees" that are mere social security numbers from whom I profit.  I don't have self importance by sitting at the top of the organizational structure.  To the contrary.  My ego is fed by watching my young leaders prosper in the organization knowing I was able to provide them with an opportunity and career path.  They did the rest, and together, we achieve levels of success over the long haul.

Young Leaders also fulfill my vision of building an organization from the bottom up.  "Top" and "Bottom" are mere adjectives to describe organizational structure.  I can argue that those who are closest to the customer really are "tops" in the organization.  Regardless, "Bottoms Up Approach" describes a "chain of command" strategy, which is also very important to the success of the business.  Those closest to the customer have the greatest insight into needs, issues and trends that are most relevant to the customer.  This is where our young leaders excel.  In my experience, the "Bottoms Up Approach" fueled by the passion and competence of our young leaders has built a sustainable and scalable business.  Another way to look at a bottom up approach is by citing an expression used by many business leaders around organizational risk: "The bottleneck is at the top (of a bottle)".

Obviously, I would encourage you to invest in young leaders based on the positive experiences I've had.  If you are so inclined, I have some advice for you.  Young adults want to be a part of something special.  Working with them to define and implement your company culture around a set of principles allows them to put their fingerprints on the organization and have a sense of ownership.  Publish your cultural principles and acknowledge those who fulfill it.  Set the example and consistently live the principles yourself on a daily basis.  As an example, in our weekly company meeting, we give out "cultural awards" to anyone who exemplifies our corporate culture.  Here are our cultural principles:
As I mentioned, this creates an environment where everyone feels they are part of something special.  This, in turn, goes a long way towards employee retention and high degrees of customer satisfaction.  Good people can always find a J-O-B, but it is very hard to find a place where they can feel part of something special.  Referencing the NY Times Best Seller Tribal Leadership: Leveraging Natural Groups to Build a Thriving Organization, we come to work each day feeling that "we're great" (stage 4), which is an organizational evolution from "I'm great" (stage 3).  Hopefully at some point we evolve to the point where we use our collective potential for a global impact (stage 5).  It all starts with developing young adults.

Hiring and developing young adults has been core to our operating model.  The growth of our organization is directly proportionate to the development of our young adults.  I am always happy to share my experiences and learn from others around this topic, so please reach out to discuss further!


Post by Lou Person


Sunday, January 24, 2016

Amazon Web Services (AWS) Simple Email Services - Lou Person

Amazon Web Services (AWS) Simple Email Services - Lou Person
Sales, IT and Business Professionals such as myself are very conscience when it comes to security.  A security breach can cause irreparable brand damage and financial losses.  It also can kill credibility and trust with users.  One of the easiest and most sinister exploits is around phishing, or email server hijacking.  In the same category is Spam, which at best is really annoying and at worst can be a front door for a virus or malware.  The vast majority of applications today, especially mobile, rely on email in one form or another for one or more of the following use cases: 

  • New account creation confirmation
  • Password reset
  • Notifications, such as receipts, an action the app wants you to take or account changes
  • Marketing or offers
There are a number of ways to send email from an application.  The others I am working with are not as Sales or Business facing as myself, so I didn't get the sense that they were overly motivated to research another solution to increase security, brand protection and minimize financial risk.  So I volunteered to attack the problem for the team.  I did a great deal of research to find a solution which was secure, contained audit controls, provided reporting, is a managed service so it could limit risk and is very cost effective.  I looked at a number of solutions, some I was familiar with, others were new to me.  I'm going to compare SMTP as part of IIS and AWS SES.

The first thing I did to evaluate environments was create a sample application to test sending email.  Here is the code:


<?php 

$action=$_REQUEST['action']; 

if ($action=="")    /* display the contact form */ 
    { 
    ?> 
    <form  action="" method="POST" enctype="multipart/form-data"> 
    <input type="hidden" name="action" value="submit"> 
    Your name:<br> 
    <input name="name" type="text" value="" size="30"/><br> 
    Email to:<br> 
    <input name="emailto" type="text" value="" size="30"/><br> 
Email from:<br> 
    <input name="emailfrom" type="text" value="" size="30"/><br>
    Your message:<br> 
    <textarea name="message" rows="7" cols="30"></textarea><br> 
    <input type="submit" value="Send email"/> 
    </form> 
    <?php 
    }  
else                /* send the submitted data */ 
    { 
    $name=$_REQUEST['name']; 
    $emailto=$_REQUEST['emailto'];
 $emailfrom=$_REQUEST['emailfrom']; 
    $message=$_REQUEST['message']; 
    if (($name=="")||($emailto=="")||($message=="")) 
        { 
        echo "All fields are required, please fill <a href=\"\">the form</a> again."; 
        } 
    else{         
        $from="From: $name<$emailfrom>\r\nReturn-path: $emailfrom"; 
        $subject="Message sent using your contact form"; 
        mail($emailto, $subject, $message, $from); 
        echo "Email sent!"; 
        } 
    }   
?> 

I then setup SMTP within my Windows server instance.  SMTP was a component of IIS through IIS 6.0.  The Web Platform Installer I discussed in an earlier post deploys IIS 8.0.  I am guessing Microsoft stopped shipping an SMTP server by default due to the same issues I am concerned with around security.  I was able to install SMTP as part of IIS 6.0 by enabling it through server management as a new feature.  It took a little bit to get working because I had to add SMTP rules to the Webserver security group and configure the server appropriately for AWS.  I was able to test the setup by using the sample php application above.  I modified the php.ini file to instruct php to use the mail server within the Windows instance as follows:

[mail function]

smtp = localhost

smtp_port = 25

Everything worked great!  Too great in fact!  I was able to send email to ANYONE from ANYONE.  I noticed that emails arriving to my gmail account were flagged as "phising" and test emails to other accounts went immediately to spam.  I had no way to control, monitor or audit what was going on.  In a real world scenario, where this could be used to email hundreds of thousands of people a day, this could be a disaster!  For internal or intranet based applications, it is probably an easy solution, but not for a public facing mobile application.

I then dug into AWS SES.  Referencing here: 
"Building a large-scale email solution is often a complex and costly challenge for a business. You must deal with infrastructure challenges such as email server management, network configuration, and IP address reputation. Additionally, many third-party email solutions require contract and price negotiations, as well as significant up-front costs. Amazon SES eliminates these challenges and enables you to benefit from the years of experience and sophisticated email infrastructure Amazon.com has built to serve its own large-scale customer base."

I had to go through a number of verifications to set it up, which was fine by me.  First, from the SES console, I had to add a txt record to my public DNS through network solutions.  Once this was added, and it had about an hour to propogate out, the SES console indicated that the domain was "verified".  Then, for each email I wanted to use as the "From" email, I had to verify through SES.  I would receive an email with a link from AWS.  Clicking on the link allowed sending from the email address.  Next, in order to send email through SES, I had to generate a username and password to embed in the application code.  The username is 20 characters long and the password 40, mixed randomly with uppercase, lowercase, and symbols.  I was not sure at this point how to test, so I found the following sample application using Visual Studio (it was actually very easy to configure):
http://docs.aws.amazon.com/ses/latest/DeveloperGuide/send-using-smtp-net.html

I was able to get the code to execute the first try, after changing username, password, smtp host address and port.  But, it would not connect, I received a message that it was sending the email, but nothing was happening, it almost appeared as if it wasn't connecting.  I looked at the security groups and realized I needed to add the standard SMTP port, 25, but also the port used by SES, 587.  I was now able to send the email and the application confirmed it was sent, but it never arrived.

I didn't realized at the time, until I contacted support via chat at 12:30AM Sunday morning, that I could only work in a "sandbox".  Meaning, I could only send email to and from verified email accounts.  I had to go through another security measure and request to have production access granted.  I submitted the form, and by the next morning, I awoke to an email congratulating me for moving out of the sandbox:

"Congratulations! After reviewing your case, we have increased your sending quota to 50,000 messages per day and your maximum send rate to 14 messages per second in AWS Region. Your account has also been moved out of the sandbox, so you no longer need to verify recipient addresses."

There are a number of other security protocols built in.  For example, I have to comply with Amazon's Acceptable Use Policy found here.  If there is a high rate of bounces in a given period, the service is suspended.  I can also view the following statistics in real time, through the SES Console, which has nice charts and graphs of the data points:  Successful Delivery Attempts, Rejected Messages, Bounces and Complaints.  Most importantly, I can "shut things down" immediatley if something goes crazy.  This is worth any nominal charges for the brand protection and financial loss avoidance it provides.

I did have one challenge that took some figuring out.  When I setup SES against the PHP application above, I received authentication errors.  In the php.ini file, I first simply changed the host name to the SES host provided in the console.  Since the C# application I ran in Visual Studio was working, I was sure things were setup correctly so the issue must be at the application level.  It took a little while to realize that the default send command within php was limited because it does not pass username and password through to the smtp server.  Thus, the authentication error.  This wasn't unix, afterall, and there isn't a sendmail service built into Windows.  Oh, wait, why not install sendmail for Windows?  A quick search of "sendmail for Windows" took me to sendmail.org and I was able to download sendmail for Windows.  I had to modify the php.ini file as follows, basically telling php to call out to sendmail:

[mail function]
sendmail_path = c:\sendmail\sendmail.exe
;smtp = localhost
;smtp_port = 25

Then, I had to modify sendmail.ini to include the hostname of the SES server, the port, the SES generated username and password.  

All of these configurations took about 15 minutes once I figured out what the problem was and came up with a solution.

I circled back with the team and simply told them that SMTP outbound email is working and they could only use a verified outbound email.  It really is a black box to the developers, but as a Sales and Business Professional, I have tremendous peace of mind that the application has much less risk and much great security controls, metrics and reporting in place because of SES.

Post by Lou Person